Sunday, March 24, 2013
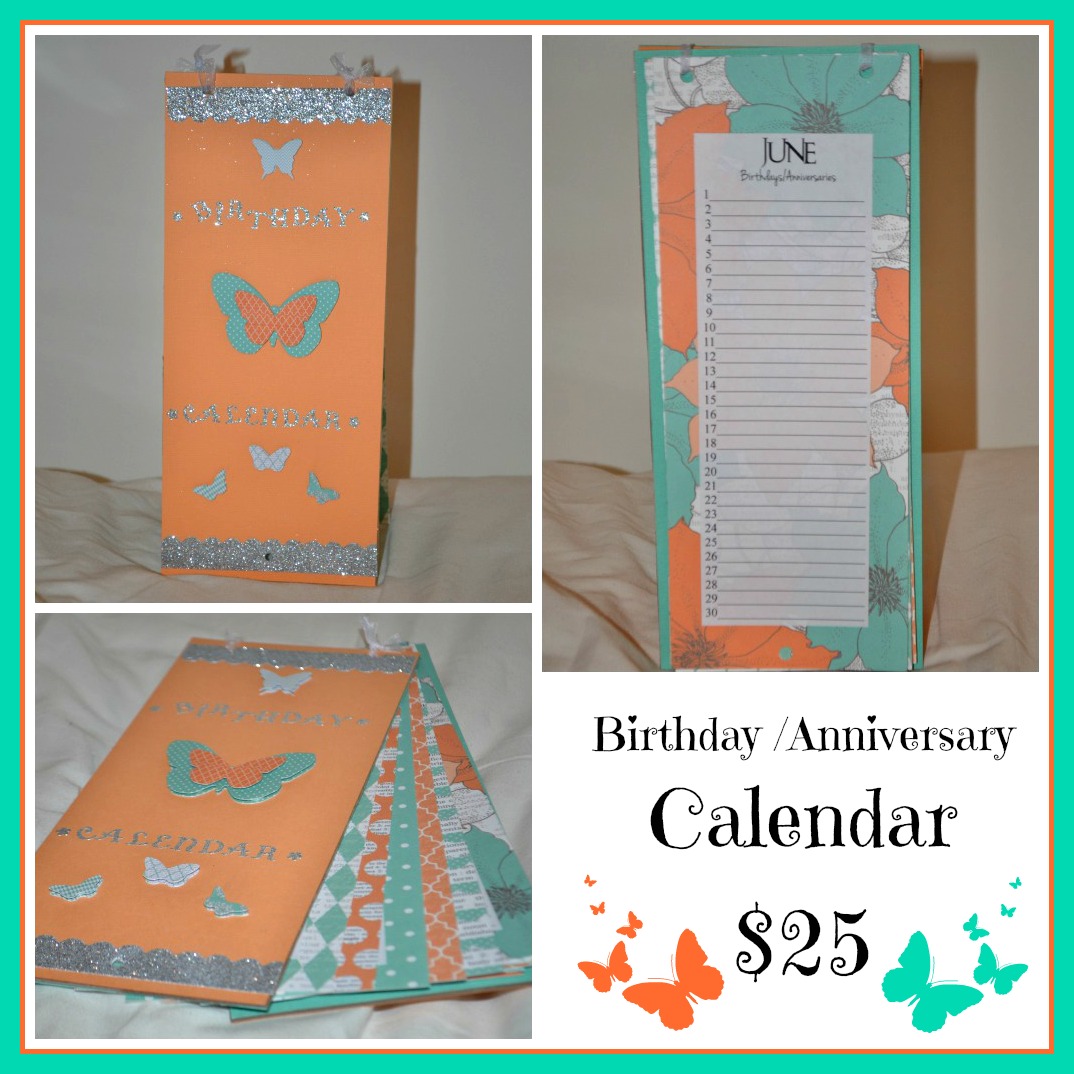
Birthday/Anniversary Calendar
This picture isn't the greatest lighting quality. I have made almost a dozen of these and each time they get cuter and cuter =) If you want to know how to make these yourself or want my personal template for the monthly calendars, email me at Karleejeanphotography@gmail.com -Karlee
Dates of family significants
This turned out to be MUCH harder than I had expected!!!! I had to make all new vinyl words because my previous ones were slightly too big :( However, I loved how it turned out!
Monday, November 26, 2012
Magnetic Make up Board
I bought a 12x12 frame, 12x12 magnetic board and a 12x12 scrapbook paper at Craft Warehouse
I painted the frame my favorite color (Tropic Bay Blue) and after it was dry, I painted on top of it, sparkle glaze. Then I used mod podge and painted the magnetic board to my scrapbook paper. Finally I took the E-6000 glue and squeezed it on the frame that was not painted. Immediatly I took the magnetic board (side that doesnt have the scrapbook paper on it) and placed it together, pressing down for about a minute. Let it sit over night to dry.
Then I bought small magnets and hot glued them to the back of my make up. I then used a heart cut out punch and my scrapbook paper and wrote what they are so I dont have to look on the back before grabbing them. Finally I mod podged the cut out hearts to the top of the make up lids. Now you are finished =)
I painted the frame my favorite color (Tropic Bay Blue) and after it was dry, I painted on top of it, sparkle glaze. Then I used mod podge and painted the magnetic board to my scrapbook paper. Finally I took the E-6000 glue and squeezed it on the frame that was not painted. Immediatly I took the magnetic board (side that doesnt have the scrapbook paper on it) and placed it together, pressing down for about a minute. Let it sit over night to dry.
Then I bought small magnets and hot glued them to the back of my make up. I then used a heart cut out punch and my scrapbook paper and wrote what they are so I dont have to look on the back before grabbing them. Finally I mod podged the cut out hearts to the top of the make up lids. Now you are finished =)
Sunday, May 20, 2012
Cucumber Lemonade... DELICIOUS
This is to die for, trust me. It sounds odd, kinda disgusting, but it will leave you wanting more! I first had it at my best friends baby shower. Ever since, I have loved making it for parties. Sense there is no alcohol in it, my brother-in-law likes to make fun of my religion and calls it "Mormon punch." Anyway.... Are you ready for this magical drink? .........I hope you said yes ;)
You need (for a party):
- 2-3 frozen lemonades
- 1-2 Cucumbers
- 3-4 two-liters of lemon-lime soda (I personally love sierra mist)
- 1 pitcher (if possible, the clear glass containers like in the picture)
How to:
- Cut the cucumbers in slices (doesnt matter if you peel the skin)
- Take the 2 frozen lemonades and your sliced cucumbers and put it in a pitcher that will fit in your fridge for 1-3hrs. (The longer its in the fridge, the more it will taste like cucumbers. I usually keep it in the fridge for 2hrs.)
- Right before the guest arrive, take the cucumber/lemonade mixture and put it in the glass pitcher. Add the lemon-lime soda and test it until it taste good to you. Normally I start with 2 two-liters and as you start to run out, you add more soda.
- Stir well and enjoy your amazing drink =)
Saturday, May 19, 2012
Girls Toddler Dress
I can't take the credit for making(sewing) these dresses (considering I was suppose to but I had just started college and my mom got to it first), but I did pick out the pattern and fabric.
This isn't really a "how to" make this dress, but I thought I would share because it's so spankin' cute!
M6271 | Children's/Girls' Top, Dress and Shorts | Girls/Boys | McCall's Patterns
This is the pattern we used. However, we did not make the shorts.
Anyway, I hope you like these darling dresses.
This isn't really a "how to" make this dress, but I thought I would share because it's so spankin' cute!
M6271 | Children's/Girls' Top, Dress and Shorts | Girls/Boys | McCall's Patterns
This is the pattern we used. However, we did not make the shorts.
Harper (above) Preslee (below)
I L-O-V-E these dresses on my niece. Maybe I am biased but Preslee and Harper are the cutest little girls! Hate that Preslee has those darn boots on. It ruins the picture to me...maybe because im a photographer and see the little things in every picture lol, but besides the boots, she looks like a famous persons daughter Easter egg hunting ... like Suri Cruise lol. Anyway, I hope you like these darling dresses.
Fruit Ice Cubes
Another delicious ice cube idea
What you need:
- Ice Cube Tray
- Fruit (whatever your heart desires)
- Water
How to:
- Cut up your fruit
- place in ice cube tray
- add water to each cube
- Freeze for 3-5hrs
- Get a cup, add water and then add your fruit ice cubes
- Enjoy =)
Strawberry Lemonade Ice Cubes
I L-O-V-E SUMMER! Mostly because I love fruit and summer is when I crave it non stop! Here is a fun way to keep your summer drink cold and not get watery.
What you need:
- Strawberries (about a pint)
- Ice cube tray
- Lemonade (Strawberry, raspberry or whatever kind of lemonade you like)
How to:
- Make lemonade
- Wash the fruit
- Cut the fruit so it will fit inside each cube of the tray
- Put the strawberries in the ice cube tray and then put the lemonade in each cube like you would with water.
- Put in freezer and wait at least 3-5 hrs. or until frozen.
- With your extra lemonade, get a cup and fill it.
- Break the cubes and put it in your cup.
- Enjoy!
Front door address wreath
Easiest project I've ever done!
What you need:
- Wreath
- Fake flowers
- Your address number
- Glue gun/sticks
- Paint (optional... If you want your numbers a certain color)
How to:
- Paint your address numbers. Let dry.
- Decide where you want your flowers
- Then start putting that hot glue gun to work by gluing it down.
- Let it dry for a couple hours and then place on your door with a nail or plastic hook.
Friday, May 18, 2012
God quote on a canvas
I loved this project. I made it for a friend who was getting sad because all her cousins are getting married this summer and she has yet to have a boyfriend. She belongs to a different faith, but no matter what, we still believe in and pray to the same God.
What you need:
- Paint (whatever color you want the background to be)
- Fake flowers (optional)
- Buttons or jewels (optional)
- Vinyl and/or paint for words
- Hot glue gun and glue sticks
- paint brushes
- Canvas
How to:
- Paint the canvas (I painted it gray and did about 3 paint coats)...Let dry
- I had "God" and "Faith" done in vinyl and I put that on.
- Then I lightly traced the quote on the canvas with a pencil. Once I liked it, I began to paint over the pencil.
- You can use a paint brush to paint the words, or you can use all vinyl.
- Don't laugh, but I used the end of a plastic stir stick to write the quote with white paint.I'm not going to lie, it took awhile. But it was well worth it. Let it dry!
- I then put the flowers on the canvas and decided how I liked it. Once I figured out how I wanted the flowers, I used a glue gun to put the flowers on the canvas.
- Then I put the cutest buttons that are clear with glitter in them, in the middle of the flowers.
Crayola Canvas
I saw this on Pinterest and LOVED it! I don't have kids but I still wanted to make one. I bought two boxes of 64 Crayola crayons. I wanted to just do blue and purple crayons but I would of had to buy 4 boxes total to get enough to fit across the canvas. Here's how I made mine.
What you need:
1. Canvas (mine is 16x20)
2. Crayons (I have about 56-58)
3. Hot glue gun with a few extra glue sticks
4. Blow dryer
5. Cardboard or lots of newspaper (it will splatter)
6. Vinyl word(s) (optional)
How to:
Carefully begin by taking one crayon and putting a strip of hot glue on the back of a crayon so that the logo (ie: crayola) is showing. Note: If you are right handed, begin left to right. If left handed, begin right to left.
- Continue to do this all the way to the end. If you want yours to look better than mine, keep it straight and lined up nicely at the top.
- I waited a day before blow drying it because it was too late at night to make a lot of noise. But if you do this during normal hours, I would wait 15-20 min. to let the hot glue set on the canvas.
- I used cardboard under the canvas and a piece on the side I was blow drying because it does splatter!
- Begin to blow dry it. It doesn't matter where you start. Keep the blow dryer close to the crayons. Works best if you blow dry the crayon from the middle.
- Once you like how it looks, stop blow drying. It does dry fast.
- I thought it needed a little something extra so I went to my local craft store, Craft Warehouse, and found a vinyl that said "Shine Bright" which seemed appropriate for it lol.
- I found that putting vinyl on a canvas is harder than I expected. Patience is a virtue I hear ;)
You are your own creator. Hope you love it!
Subscribe to:
Posts (Atom)